What is OpenFire ?
Openfire (previously known as Wildfire, and Jive Messenger) is an instant messaging (IM) and groupchat server that uses XMPP server written in Java and licensed under the Apache License 2.0.
Openfire is a real time collaboration (RTC) server licensed under the Open Source Apache License. It uses the only widely adopted open protocol for instant messaging, XMPP (also called Jabber). Openfire is incredibly easy to setup and administer, but offers rock-solid security and performance.
A small introduction to Jabber/XMPP Protocol
The Extensible Messaging and Presence Protocol (XMPP) is a protocol for streaming XML [XML] elements in order to exchange messages and presence information in close to real time.
All Jabber/XMPP servers are connected in one global communication network so you will be able to send messages to friends who have accounts on other Jabber servers.
This is very much like sending e-mail but the difference between Jabber and e-mail is the same as difference between post a traditional mail and talking on the phone.
All messages send through Jabber are sent instantly and you can also receive response instantly. More over you can see whether you mate is online and available for talking or not.
Jabber on the other side allows you to deploy server in your own company network. So employees can talk securely and all information go through company secure network. Of course if offices are located in different places or countries then all messages are transmitted over the public network – Internet. But Jabber supports SSL/TLS – secure connections which helps you protect your discussion.
And then if your employees need to contact customer outside your company whole discussion can go through your server and server located on customer side.
Now it’s time to know about jappix :-
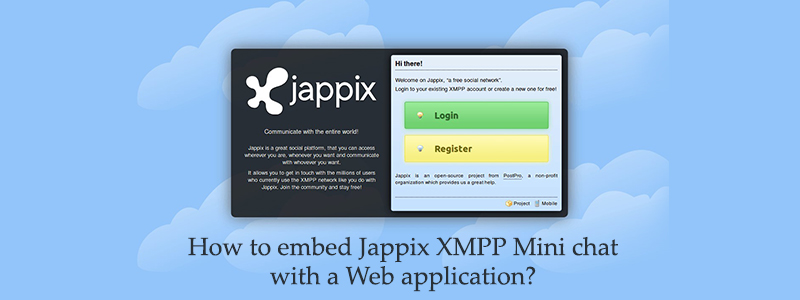
Jappix is an open-source XMPP web-client, based on a decentralized architecture for its official service. The client is developed using JavaScript JSJaC and jQuery libraries, the PHP engine and the usage of HTML 5 standards. It makes Jappix usable in every modern web browser. It is easy to embed this Jappix client on your OpenFire Server.
Installation :-
In order to use the Jappix mini chat on our web application, we first have to get Jappix plugin installed on a OpenFire server of the organization.
Please find more details about Jappix and OpenFire on http://igniterealtime.org.
To be more precise, the Jappix with OpenFire is explained in the following URL:
http://community.igniterealtime.org/docs/DOC-2195
Code Part :
After getting Japppix web chat working on your OpenFire server, we can quickly embed Jappix mini chat using following JavaScript code. It is minimal and clean!
To use it on your website, simply put this code on all your page head elements:
<script type="text/javascript" src="http://ajax.googleapis.com/ajax/libs/jquery/1.4.4/jquery.min.js"></script> <script type="text/javascript" src="http://{YOUR_JAPPIX}/php/get.php?l=en&t=js&g=mini.xml"></script> <script type="text/javascript"> jQuery(document).ready(function() { // Define groupchats here MINI_GROUPCHATS = []; MINI_PASSWORDS = []; // Define chats here MINI_CHATS = []; // Add an animation MINI_ANIMATE = true; // Define the user nickname MINI_NICKNAME = "Nickname"; // Random user nickname (if no nickname) MINI_RANDNICK = true; // Override the default session resource MINI_RESOURCE = "MyOwnResource"; // Connect the user (autoconnect, show_pane, domain, username, password) // Notice: put true/false to autoconnect and show_pane launchMini(false, true, "anonymous.jappix.com"); }); </script>
Configuration :-
Account connection
1.Instead of {YOUR_JAPPIX} in script give your OpenFire Server URL . The code above works for “anonymous” login
(Your openfire configuration should have this feature enabled).
if u have an account with username and password you can pass them as parameters for launchMini function as explained below:
launchMini(false, true, “anonymous.jappix.com“, “user”, “password”);
You can find the detailed documentation – https://github.com/jappix/jappix/wiki/JappixMini
User nickname
2.To specify an user nickname (which can be generated with PHP from a database), you can use the MINI_NICKNAME global.
Please note that you can safely remove it and the account nick will be used.
Final Steps:
a) Once the page loads with mini-chat, Jappix mini chat will start authenticating the user by binding an ajax call. So if the Web app and Jappix web-chat are installed on different servers, the domain binding should be configured by your OpenFire admin. Otherwise, your Jappix webchat fails to work. The cross domain functionality is a must when you want to make use of the services on a different domain.
b)Hacking our way out!
Apart from this, you might find your Jappix client connecting to a local URL and port of XMPP service. As we won’t have access to edit the code of plugin configured on OpenFire server,
Here is a quick way to bind the mini chat to correct OpenFire server ports.
In Apache (where the code of your app deployed) configuration, add the following lines to virtul host configuration of the domain:.
ProxyPass /http-bind/ http://<OpenFire Server URL>:7070/http-bind/
ProxyPassReverse /http-bind/ http://<OpenFire Server URL>:7070/http-bind/
Replace <OpenFire Server URL> with the correct domain name or ip of your OpenFire server and restart the web server.
Now, its time to enjoy chatting on your website through your Jappix MiniChat and relax!
Extra-features
You can call the disconnectMini() function anytime and anywhere to reset Jappix Mini to its initial look and disconnect the user (if logged in).
Read Instacarma’s Latest posts:
How to Select the Best Hosting Automation Software Solution?
Cloud Implementation Consultation Practices that will Prevail in 2017
DevOps Basics You Should Know Before Adopting Services
For highly competitive pricing and excellent 24/7 web hosting Technical Support Services contact InstaCarma today!


